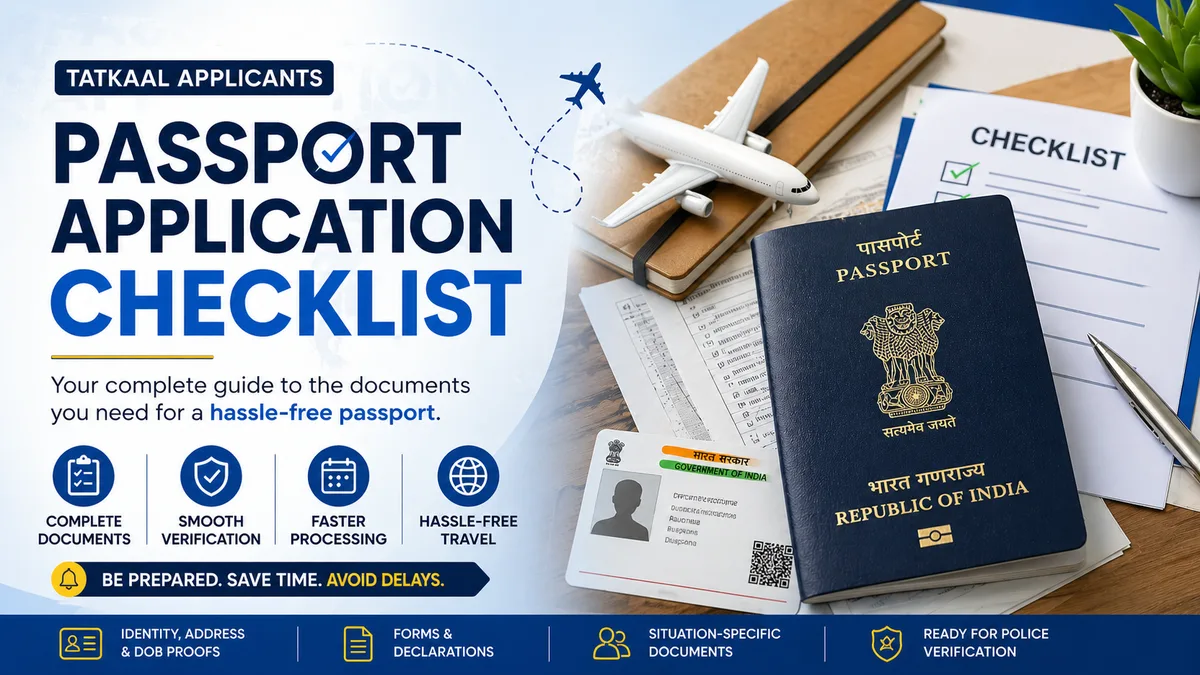
The official Japan visa application form is a two-page document that every Indian applicant must print on two separate single-sided A4 sheets and submit in hard copy to VFS Global; you can complete it digitally using a PDF editor or neatly by hand in black capital letters, but you must never leave any fields blank (write "N/A" for non-applicable boxes like Guarantor and Inviter), affix a 45 mm × 35 mm matte photograph, and sign by hand with a physical ink signature matching your passport. While assembling bank statements, income tax returns, and flight reservations takes days of preparation, clerical errors on the application form itself remain one of the most common reasons VFS officers turn applicants away at the intake counter or issue administrative delay slips.
(All visa procedures, document requirements, and fee schedules cited in this guide reflect the official 2026 Embassy of Japan in India and VFS Global requirements. The statutory visa fee is ₹500 for a single-entry tourist visa, accompanied by standard VFS service charges.)
Whether you are traveling solo, as a couple, or with family, the consular officers at the Embassy of Japan in New Delhi and the Consulates-General in Mumbai, Bengaluru, Chennai, and Kolkata cross-examine your two-page application form against your Schedule of Stay (滞在予定表) and hotel vouchers. Any discrepancy between the first hotel declared on page one and your itinerary introduces unnecessary doubt. This guide breaks down both pages field by field, clarifies the official "N/A" convention, explains exact photo specifications, and provides a verified sample for Indian passport holders.
Where to Download the Official Japan Visa Application Form
Do not download editable application forms from third-party travel agencies, paid visa portals, or untrusted aggregators. Japanese consular missions update their document templates periodically, and submitting an obsolete format risks immediate refusal at the VFS counter.
Always retrieve the genuine, fillable PDF directly from official diplomatic sources:
Download the official VFS Japan Visa Application Form PDF (verified official 2024/2026 revision).
Cross-check your supporting document dossier against the official VFS Tourism Visa Checklist.
Before writing a single word, decide how you will complete the document:
Completion Method | Legibility & Presentation | Error Handling | VFS Intake Verdict |
|---|---|---|---|
Digital Typing (Recommended) | Flawless; typed block text eliminates handwriting misinterpretation | Edit typos instantly in your PDF reader before printing | Preferred by consular staff; reduces manual data-entry delays |
Handwritten in Pen | High risk of illegible digits, cramped addresses, and ink smudges | Any crossing out or correction fluid (whitener) voids the page | Accepted only if written in neat black capital letters |
Crucial Rule: Even if you type the entire form digitally on your laptop, you must print it out and sign page two physically with a wet-ink pen. Digital e-signatures, copied signature images, and stylus signatures are strictly rejected across all VFS India application centres.
Page 1 Walkthrough: Personal Identity, Flights, and First Accommodation
Page one captures your legal identity, passport authenticity, proposed travel schedule, and employment details. Consular officers cross-check these fields directly with your passport bio page and flight reservation.
Personal Identity and Passport Information (Page 1 Top)
Surname: Enter your family name exactly as printed in your Indian passport (e.g.,
SHARMA).Given and middle names: Enter your first and middle names matching your passport bio page (e.g.,
RAHUL KUMAR).Other names: If you have never been known by any alias or maiden name, write
N/A.Date of birth: Enter your birth date in Day/Month/Year numerical order (e.g.,
14/08/1992).Place of birth: State your city, state, and country exactly as shown in your passport (e.g.,
NEW DELHI, DELHI, INDIA).Sex & Marital status: Check the appropriate box (
MaleorFemale;Single,Married,Divorced, orWidowed).Nationality or citizenship: Write
INDIAN.Former and/or other nationalities: Write
N/A(unless you previously held citizenship in another nation).ID No. issued to you by your government: Indian applicants should enter their Aadhaar Number or PAN Card Number (e.g.,
1234 5678 9012orABCDE1234F). If the applicant is a young child without government-issued photo identity documents, writeN/A. Never leave this line blank.Passport type: Check
Ordinary(standard navy-blue Indian passport).Passport No.: Enter your eight-character Indian passport number (e.g.,
Z1234567).Place of issue: Enter the Regional Passport Office city printed on your passport (e.g.,
DELHI,MUMBAI,BENGALURU).Date of issue & Date of expiry: Enter dates in DD/MM/YYYY format matching your passport bio page. Ensure your passport carries at least six months of remaining validity and two blank pages.
Issuing authority: Write
GOVERNMENT OF INDIAorREGIONAL PASSPORT OFFICE, DELHI.Certificate of Eligibility (COE) No.: Independent tourists do not have a COE. Write
N/A.
Travel Dates, Flight Route, and First Hotel Base (Page 1 Middle)
This section links your application form to your NextDestination itinerary and flight booking:
Purpose of visit to Japan: Write
TOURISM (HOLIDAY)orSIGHTSEEING. Do not write vague terms like "leisure" or "personal".Intended length of stay in Japan: State the exact duration matching your Schedule of Stay (e.g.,
10 DAYSor14 DAYS).Date of arrival in Japan: Enter your landing date according to your flight ticket (e.g.,
15/10/2026). Note that if you take an overnight flight departing Delhi or Mumbai late on 14 October and touching down the following morning, your arrival date is15/10/2026.Port of entry into Japan: Enter your arrival airport and code, such as
NARITA (NRT),HANEDA (HND), orKANSAI (KIX).Name of ship or airline: Enter your inbound flight number (e.g.,
AIR INDIA AI 306orALL NIPPON AIRWAYS NH 828).Names and addresses of hotels or persons with whom applicant intends to stay: This is where many first-time applicants make a critical error by trying to cram four different hotels from Tokyo, Hakone, Kyoto, and Osaka into a two-line box. Enter your Hotel Base #1 only—the accommodation where you will sleep upon landing in Japan. Provide the hotel name, telephone number (with the
+81Japan country code), and complete street address matching your booking voucher (e.g.,HOTEL GRACERY SHINJUKU, TEL: +81-3-6833-1111, 1-19-1 KABUKICHO, SHINJUKU-KU, TOKYO 160-8466). The comprehensive sequence of your other regional stays belongs on your Schedule of Stay.Dates and duration of previous stays in Japan: If this is your first journey to Japan, write
N/A. If you have visited Japan before, list the previous entry and exit dates and total days (e.g.,10/05/2024 TO 20/05/2024, 11 DAYS).
Tip: If you are assembling a classic multi-city route, your declared dates and first hotel must align seamlessly with your daily Schedule of Stay. Refer to our curated 10-day Japan itinerary to verify how a well-paced Tokyo-to-Kyoto route establishes clean base locations and realistic transit connections for your application file.
Current Employment and Residential Address (Page 1 Bottom)
Your current residential address: Provide your full Indian residential address including flat number, apartment complex, street, city, state, and postal PIN code.
Tel. & Mobile No.: Enter your primary Indian mobile number with country code (e.g.,
+91 98765 43210).E-Mail: Enter a personal email address that you monitor daily.
Current profession or occupation and position: State your professional designation clearly (e.g.,
SENIOR SOFTWARE ARCHITECT,MARKETING MANAGER,CONSULTANT).Name and address of employer: Enter your company name, full office address, and office contact telephone number. Consular verification teams occasionally place confirmation calls to corporate HR departments.
Special categories:
Homemakers: Write
HOMEMAKER (SUPPORTED BY SPOUSE). In the employer box, writeN/A, and provide your spouse's employment letter and financial proof in your application dossier.Students: Write
STUDENT. Enter your school or university name, campus address, and official telephone number.Business Owners & Freelancers: Write
BUSINESS PROPRIETORorINDEPENDENT CONSULTANT, enter your registered firm's trade name and address, and attach your GST registration or company incorporation documents.
Page 2 Walkthrough: Guarantor, Inviter, and Legal Declarations
Page two resolves the single largest source of confusion for Indian tourists—the Guarantor and Inviter fields—and concludes with mandatory legal disclosures and your physical signature.
The Guarantor and Inviter in Japan Dilemma (Page 2 Top)
The top half of page two asks for comprehensive details regarding a "Guarantor or reference in Japan" and an "Inviter in Japan". If you are an independent tourist funding your own holiday, you do not have an inviter or guarantor.
Many Indian travelers mistakenly assume that leaving these boxes blank will cause visa rejection, or conversely, that they must hire an agent in Tokyo to serve as a sponsor. Neither is true:
Self-funded tourism requires no Japanese guarantor. Consular officers evaluate your financial eligibility entirely on your Indian bank statements (showing a healthy closing balance of roughly ₹2,000,000–₹3,00,000 per person) and your last 2–3 years of Indian Income Tax Returns (ITR-V).
How to fill it: In the "Name" line of Guarantor or reference in Japan, write
N/A. Across all subsequent sub-fields—includingTel.,Address,Date of birth,Sex,Relationship to applicant,Profession or occupation, andNationality and immigration status—writeN/Aor draw a neat diagonal strike-through withN/Awritten clearly.Repeat the exact same procedure for the Inviter in Japan section: write
N/Aacross all fields.
When does this section actually apply? You only complete the Guarantor and Inviter sections if you are applying for a visiting friends/relatives visa or a commercial business visa supported by a resident in Japan. In those scenarios, your host must issue a formal Letter of Guarantee, a Certificate of Residence (Juminhyo), and taxation certificates. For a complete breakdown of when formal sponsorship is mandatory, read our guide on the Japan visa invitation letter and guarantee forms.
Partner's Occupation and Special Remarks
Partner's profession/occupation (or that of parents, if applicant is a minor): If married, state your spouse's occupation (e.g.,
CHARTERED ACCOUNTANTorSOFTWARE ENGINEER). If single, writeN/A. If the applicant is a minor child, state the father's or mother's primary profession (e.g.,SALARIED - VP OPERATIONS).Remarks/Special circumstances, if any: This field is optional. If you are a standard tourist visiting Japan on holiday, write
NONEorN/A. Only use this space if you have specific administrative notes to bring to the consul's attention (such as urgent travel dates for an international conference).
Criminal and Legal History Questions (Page 2 Middle)
The form presents six statutory legal declarations. Read each question carefully and check the corresponding Yes or No box:
Have you ever been convicted of a crime or offence in any country? →
NoHave you ever been sentenced to imprisonment for 1 year or more in any country? →
NoHave you ever been deported or removed from Japan or any country for overstaying your visa or violating any law or regulation? →
NoHave you ever been convicted and sentenced for a drug offence in any country...? →
NoHave you ever engaged in prostitution or related activities...? →
NoHave you ever committed trafficking in persons...? →
No
Ticking Yes to any of these questions triggers an automatic consular review requiring detailed supporting legal court records.
Date of Application and Physical Wet-Ink Signature (Page 2 Bottom)
Date of application: Enter the date you are physically submitting your dossier at the VFS counter in DD/MM/YYYY format (e.g.,
28/09/2026).Signature of applicant:
The signature must be executed with a physical pen in black or blue ink.
The signature must match the specimen signature on your Indian passport bio page.
Minors under 18 years: The child does not sign alone. A parent must sign the form on the child's behalf, writing their relationship next to the signature (e.g.,
[Parent's Signature] (Father)or[Parent's Signature] (Mother)).Never allow a travel agent, courier, or third party to sign the form for you; forging signatures violates the consular declaration and leads to blacklisting.
Annotated Field Reference Table for Indian Tourists
Keep this quick reference open as you type your PDF or fill your physical application sheet:
Form Section & Field | Exact Input for Indian Self-Funded Tourist | Critical Rule to Remember |
|---|---|---|
ID No. issued by government | Aadhaar Number (e.g., | Never leave blank; write |
Passport Type | Check | Blue passport = Ordinary; Maroon = Diplomatic; White = Official |
Issuing Authority |
| Check your passport page; matches the national issuing text |
Certificate of Eligibility |
| Tourists travel without COE; required only for work or long-term visas |
Purpose of Visit |
| Never write ambiguous terms like "personal" or "transit" |
Intended Stay Duration | Exact days (e.g., | Must match your Schedule of Stay entry and exit calculations |
Hotel Name & Address | First hotel base details only ( | Do not cram secondary cities here; full list lives in your visa schedule |
Guarantor in Japan |
| Independent tourists do not have a sponsor; does not hurt approval |
Inviter in Japan |
| Self-funded trips require no local contact |
Date of Application | Submission date at VFS (DD/MM/YYYY) | Update date if your appointment gets rescheduled |
Applicant Signature | Original wet-ink ballpoint signature | Must match passport bio page; parent signs for minor with relationship |
Official Photo Specifications: The 45 mm × 35 mm Rule
One of the most persistent myths on Indian travel blogs is that the Japan visa requires a square 2-inch by 2-inch (51 mm × 51 mm) or 45 mm × 45 mm photograph.
The official VFS application form header explicitly specifies: (Paste photo here) 45mm x 35mm or 2in x 1.4in.
┌─────────────────────────────────┐
│         45 mm Height            │
│  ┌───────────────────────────┐  │
│  │   32 mm to 36 mm Face     │  │
│  │    (Crown to Chin)        │  │
│  │                           │  │
│  └───────────────────────────┘  │
│          35 mm Width            │
└─────────────────────────────────┘
Adhere strictly to these photographic standards:
Dimensions: Exactly 45 mm high by 35 mm wide. The face (from the top of the hair crown to the bottom of the chin) must occupy between 70% and 80% of the frame (roughly 32 mm to 36 mm).
Background: Pure white or light off-white background with no patterns, shadows, or reflections.
Recency: Taken within the last six months. Consular staff routinely compare the application photograph with past passport stamps; if you submit a photograph identical to a visa issued three years ago, the photo will be rejected immediately.
Finish: Matte or semi-matte photographic paper. Glossy prints that produce flash reflections under consular scanners are frequently rejected.
Facial Expression: Neutral expression with both eyes open, looking directly into the camera. Mouth closed.
Eyewear & Headgear: Prescription glasses must have thin frames with no tinted lenses and zero glare on the glass. Religious head coverings (such as turbans or hijabs) are permitted, provided the full facial oval from chin to forehead remains unobstructed.
Affixing to Form: Glue the photograph neatly in the designated box on page one using a standard glue stick. Do not staple, pin, or paperclip the photograph to the application form. Piercing the photo with staples damages consular scanning apparatus.
The 6 Critical Mistakes That Trigger VFS Counter Rejection
Avoiding administrative refusal requires understanding where consular review teams identify red flags:
1. Leaving Non-Applicable Fields Completely Blank
Consular officers cannot distinguish between a field intentionally skipped because it does not apply versus an accidental omission. Whenever a box does not apply to your profile—such as Certificate of Eligibility, Other Names, Guarantor, or Inviter—always write N/A.
2. Discrepancy in Travel Dates or Hotel Name
If your application form states you land in Tokyo on 15 October staying at Hotel Gracery Shinjuku, but your Schedule of Stay lists your arrival on 16 October at an APA Hotel in Ueno, your application will be flagged for conflicting documentation. Cross-verify every field across your application form, flight itinerary, hotel vouchers, and Japan visa documents checklist for Indians.
3. Submitting Double-Sided Printouts
The Embassy of Japan requires all forms and supporting documents submitted on single-sided A4 paper. Printing page one on the front and page two on the back of a single sheet of paper will result in the VFS officer asking you to step out of the queue and reprint your form at the on-site photocopy booth.
4. Cutting Off Page Margins or Barcodes
When printing your completed PDF from Adobe Acrobat or your browser, always select "Actual Size" (100% scaling) rather than "Fit to Printable Area". Shrinking the page can clip form borders and distort alignment.
5. Signature Mismatch or Digital Signatures
The signature on page two must match the physical signature on your passport. If your passport carries a signature written in 2017 and your natural handwriting has evolved, practice replicating your passport signature before signing page two. Never use digital signatures or paste an image of your signature.
6. Contradictions with Your Accompanying Cover Letter
Your application form, itinerary, and cover letter form an integrated narrative. If your cover letter mentions traveling as a family while the application form indicates traveling alone, officers will demand clarification. Use our verified Japan visa cover letter sample for Indians and review the common pitfalls outlined in our guide on Japan visa rejection reasons for Indians.
Frequently Asked Questions
Can I fill the Japan visa application form by hand?
Yes. You can complete the form by hand using neat black ballpoint pen in legible capital block letters. However, typing your details digitally into the fillable PDF and printing the completed document is strongly recommended because it eliminates illegibility and simplifies consular data entry.
Is an inviter or guarantor required for a Japan tourist visa from India?
No. Independent tourists traveling to Japan for leisure do not require a guarantor or inviter. Simply write N/A in the Name line and across all sub-fields in both the Guarantor and Inviter sections on page two. Self-funded applicants qualify based on their own bank balance and Indian tax returns.
What should I write under "ID No. issued to you by your government"?
Indian citizens should enter their 12-digit Aadhaar Card Number or 10-digit PAN Card Number. If applying for an infant or minor child who has not yet been issued an Aadhaar card, write N/A. Do not leave the field blank.
What hotel address should I enter if my trip spans multiple cities?
Enter the name, telephone number (including the +81 Japan country code), and complete street address of your first hotel base only (where you will check in upon arrival in Japan). Do not attempt to list hotels in Kyoto, Osaka, or Hakone in this small box; your complete inter-city hotel itinerary is presented on your Schedule of Stay.
Can I print the application form on both sides of one sheet?
No. VFS Global and the Embassy of Japan strictly mandate single-sided printing on clean white A4 paper. Print page one and page two on two separate sheets of paper.
What should I do if my child is traveling with me?
Every applicant, including infants and minors, requires a separate application form and dedicated photograph. For children under 18 years of age, a parent must sign page two on the child's behalf, writing their relationship next to the signature (e.g., [Signature] (Father)).
Complete Your Submission with a Grounded Travel Itinerary
Filling out your visa application form accurately is the first half of a successful application; the second half is presenting a realistic, day-by-day travel plan that matches your declared dates and accommodation.
Instead of manually drafting complicated tables, use NextDestination to build your custom Japan travel itinerary in minutes. Generate dated daily routes between Tokyo, Kyoto, and Osaka, export your complete Schedule of Stay for VFS submission, and proceed to the visa counter with complete confidence.